Page 20 of 25
Re: Victor
Posted: Tue Mar 21, 2017 8:56 pm
by easyrider
Re: Victor
Posted: Sun Mar 26, 2017 2:05 am
by easyrider
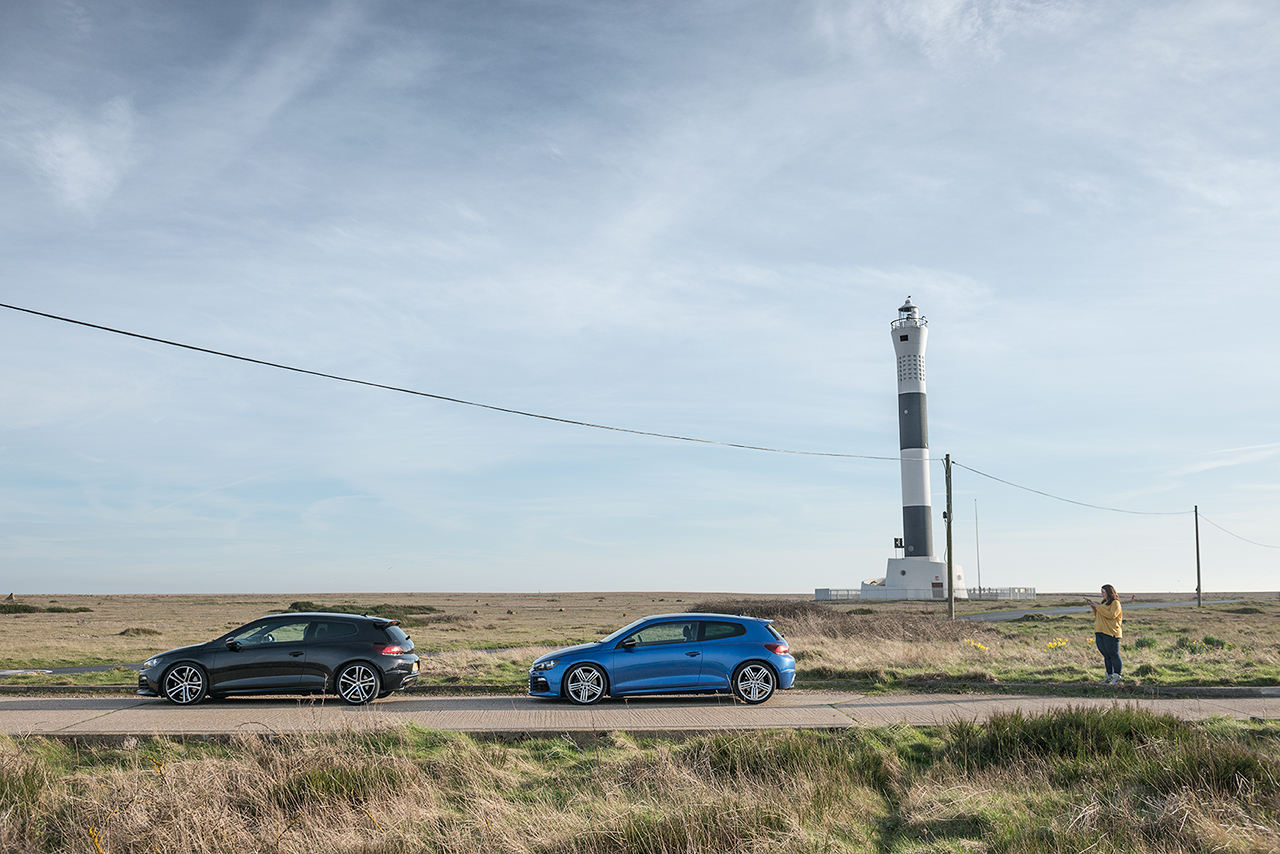
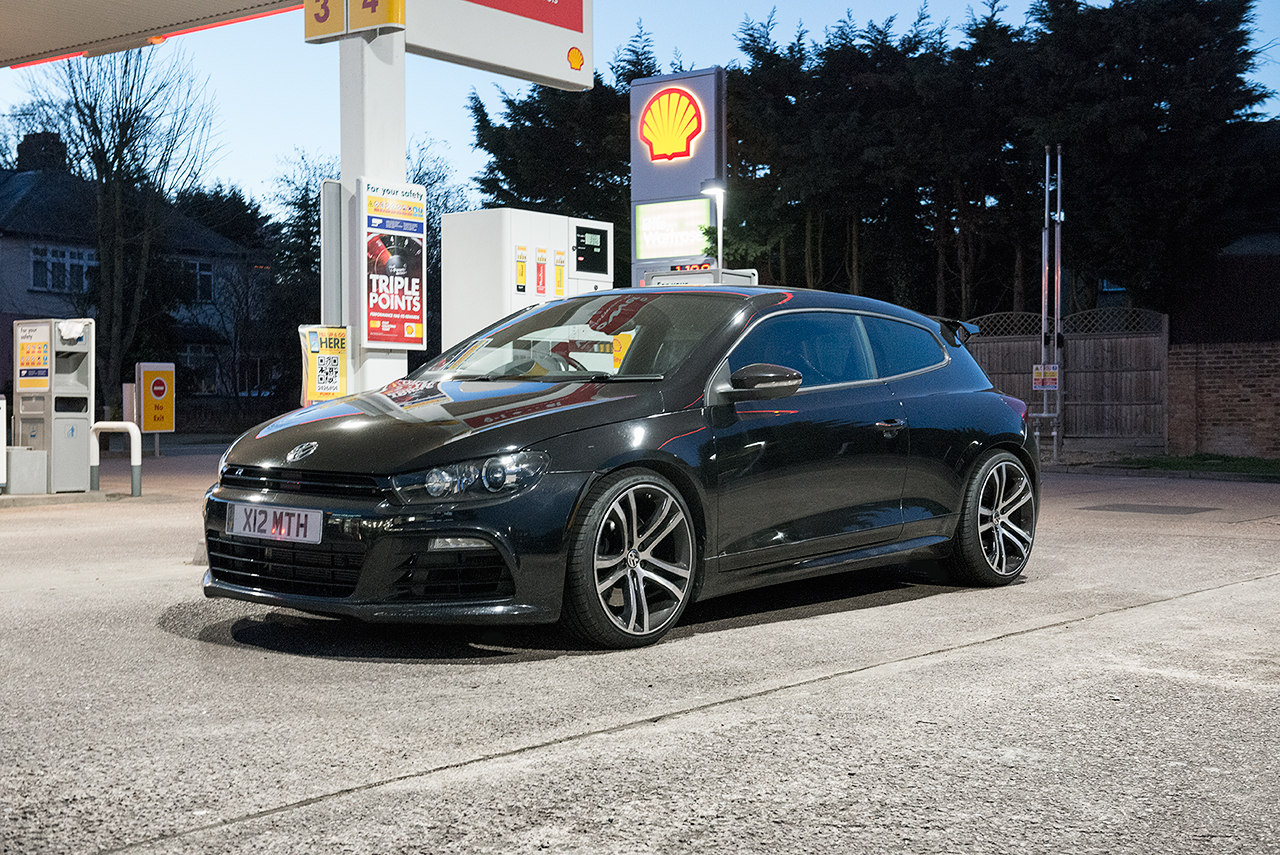
do love a shell station. might as well i'm there often enough lol.
Re: Victor
Posted: Mon Mar 27, 2017 3:42 pm
by easyrider
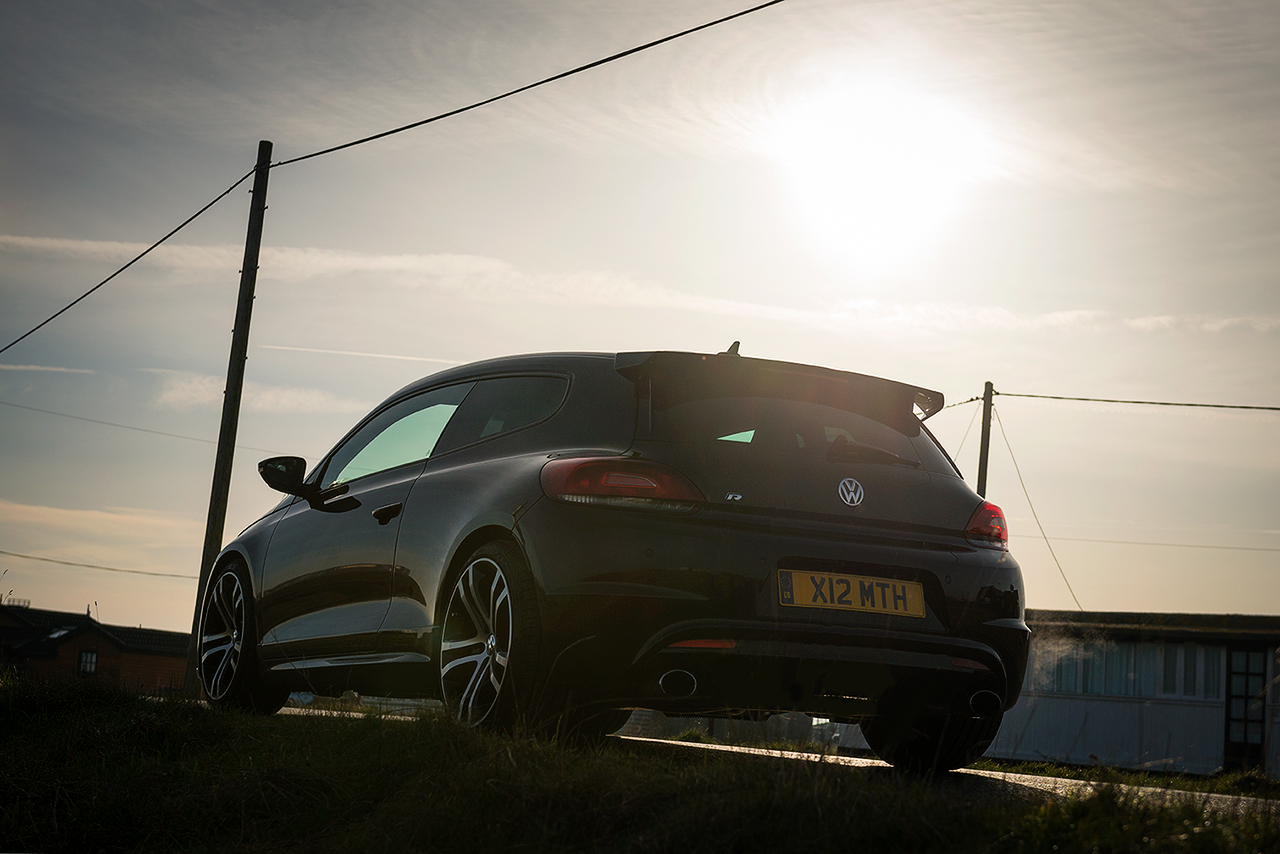
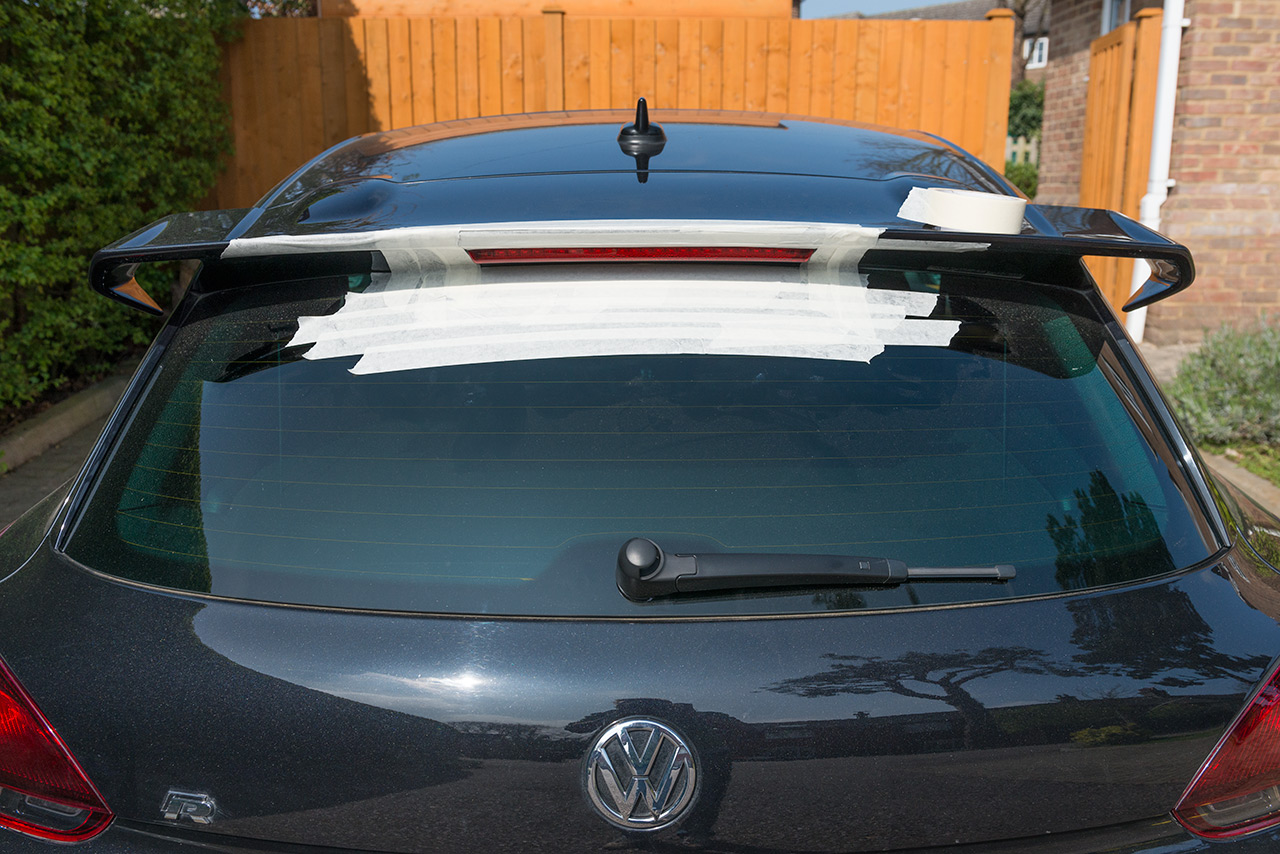
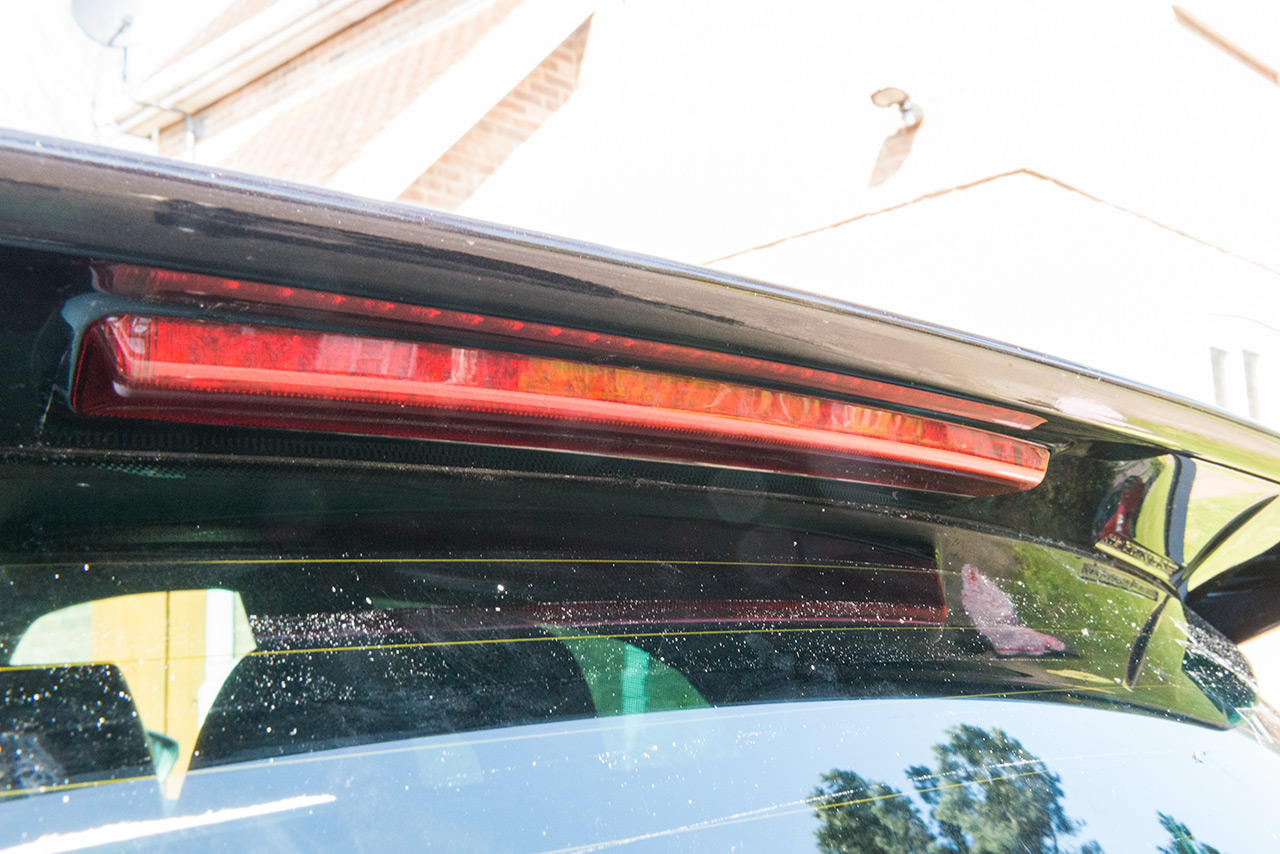
absolutely love my cup spoiler but they do come with one huge downside: they're bonded on so if an led goes out on the third brake light you're in trouble!
there's no way to access the screws that hold it in and of course a few months ago one of the leds in mine went and the reality of fixing it took a lot of time, worry and research. everyone said don't bother but i wanted it sorted and mint again, and another could blow and then it'd be a laughing point rather than a feature. had to be done.
so here's my how to on replacing the third brake light on an oem cup spoiler... the hard way:
part 1.
1. prep everything - tools out, double check you have everything you may need, cos once it's out you can't drive it anywhere till it's fixed... hmm. mask off around the spoiler
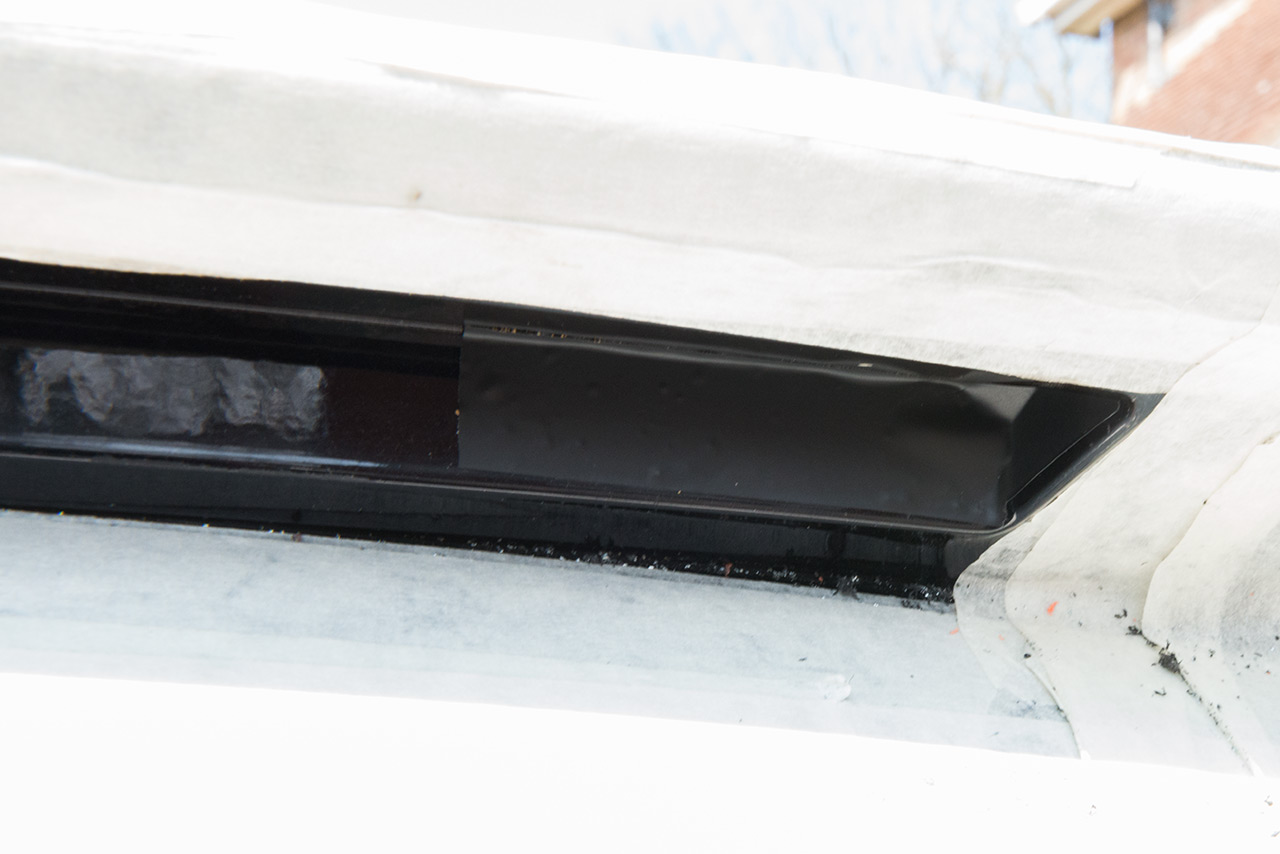
2. using a dremel, CAREFULLY drill round the edge of the red lens to get to the led rack behind. don't go too near the edges or corners - yet.
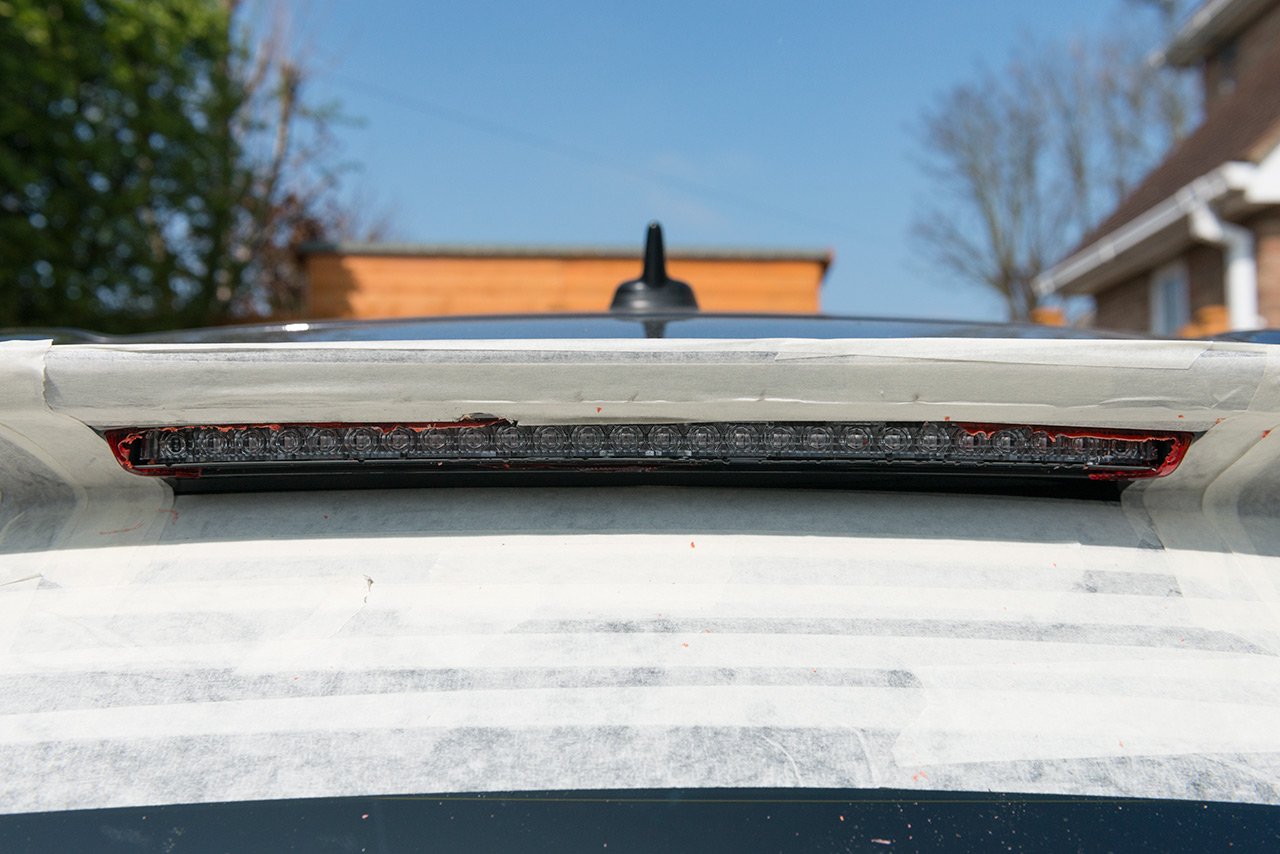
3. concentrate on once side at a time, chip out the led rack
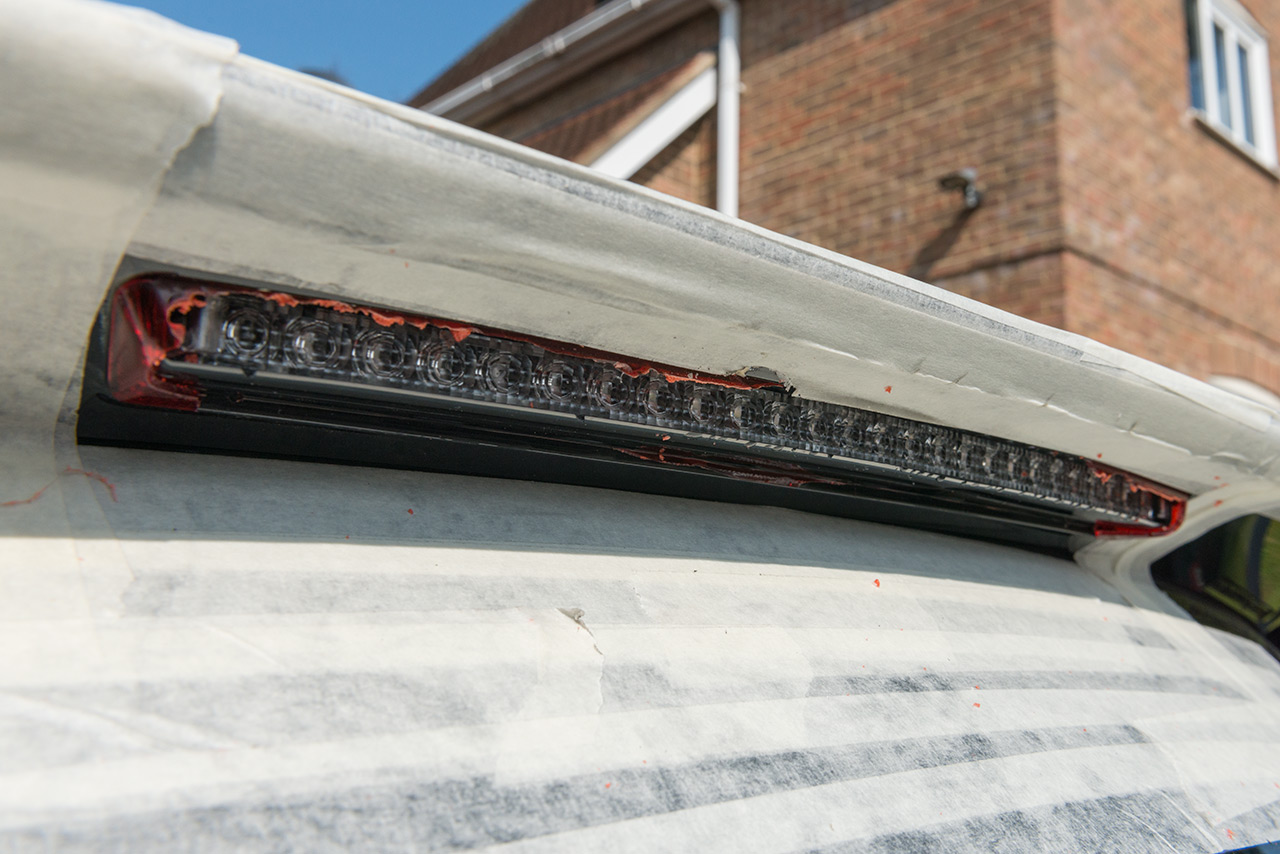
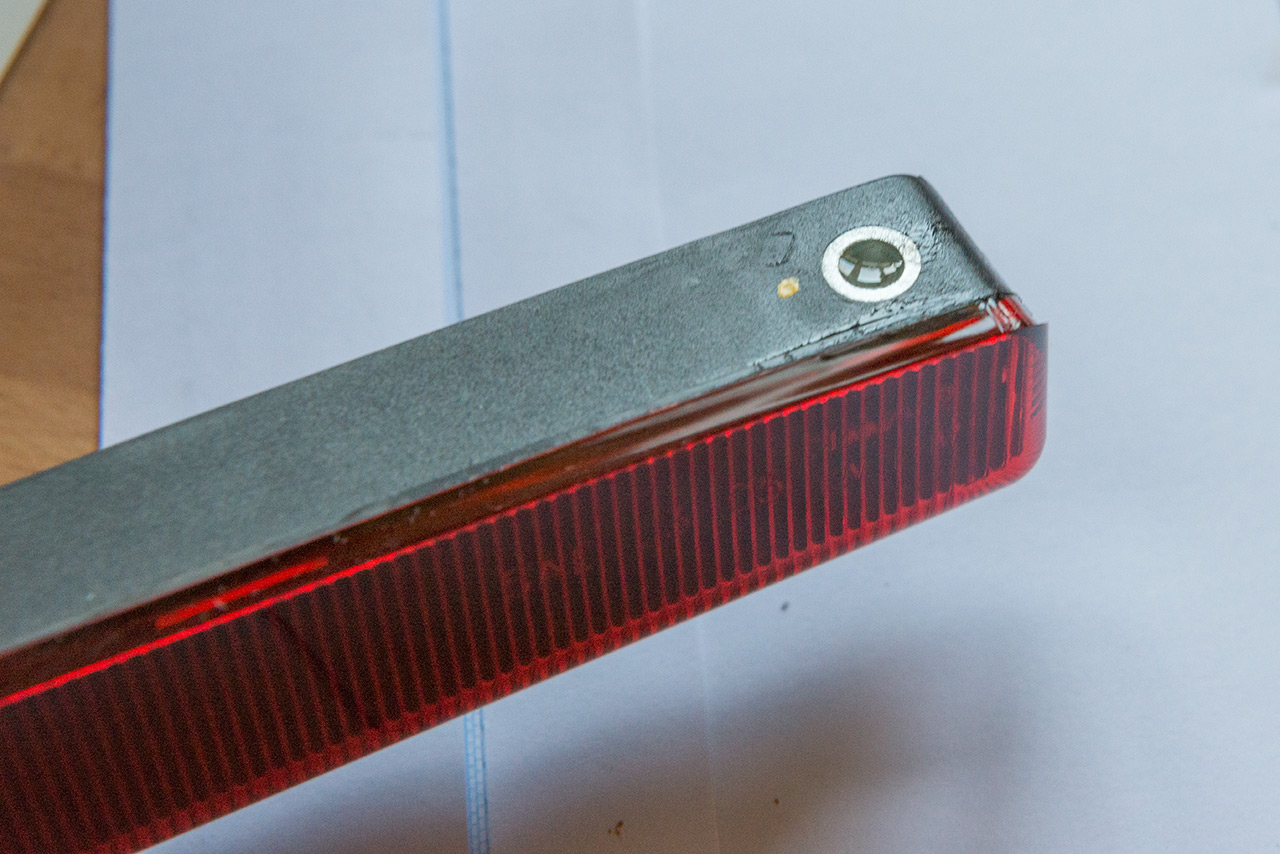
4. the screws that hold the light in place are on the far edges. these have to be cut out. don't drop them inside the spoiler!
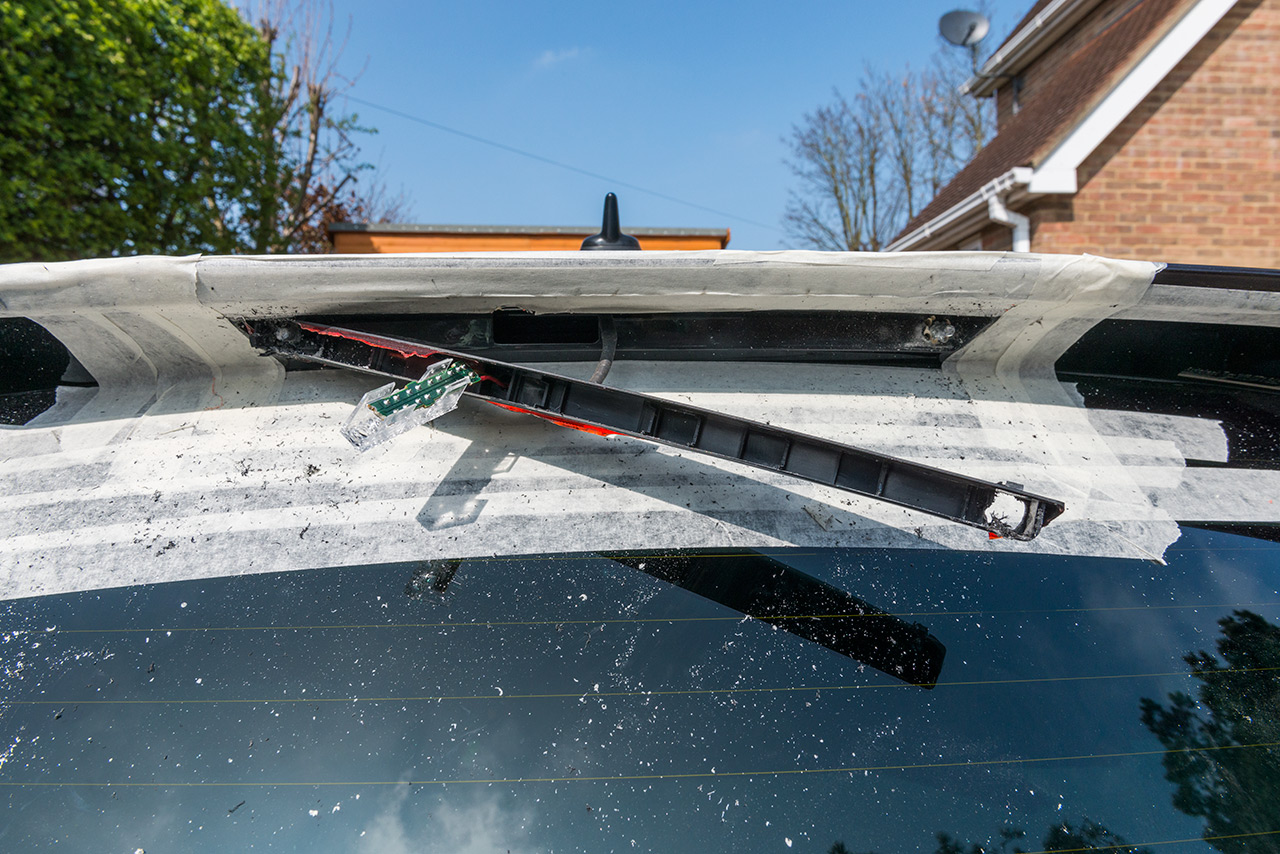
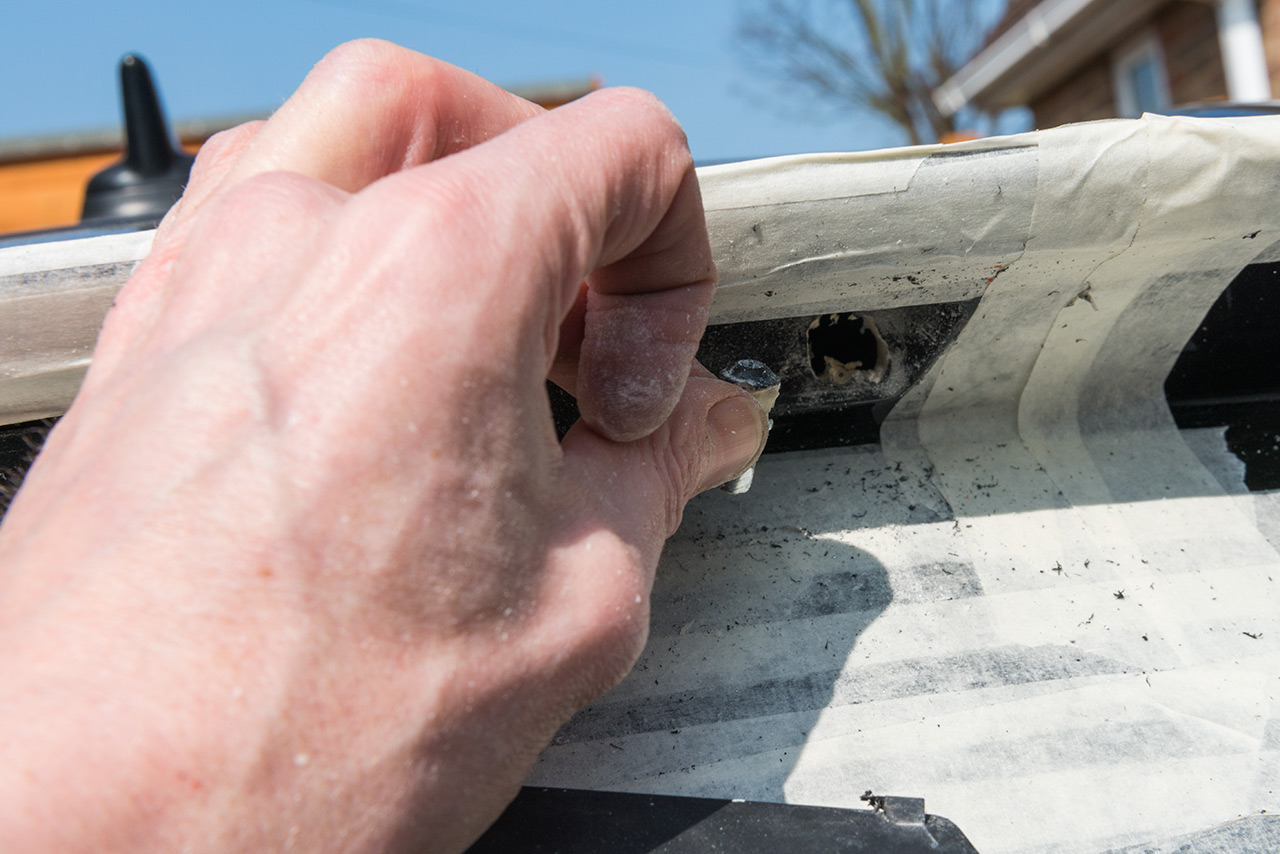
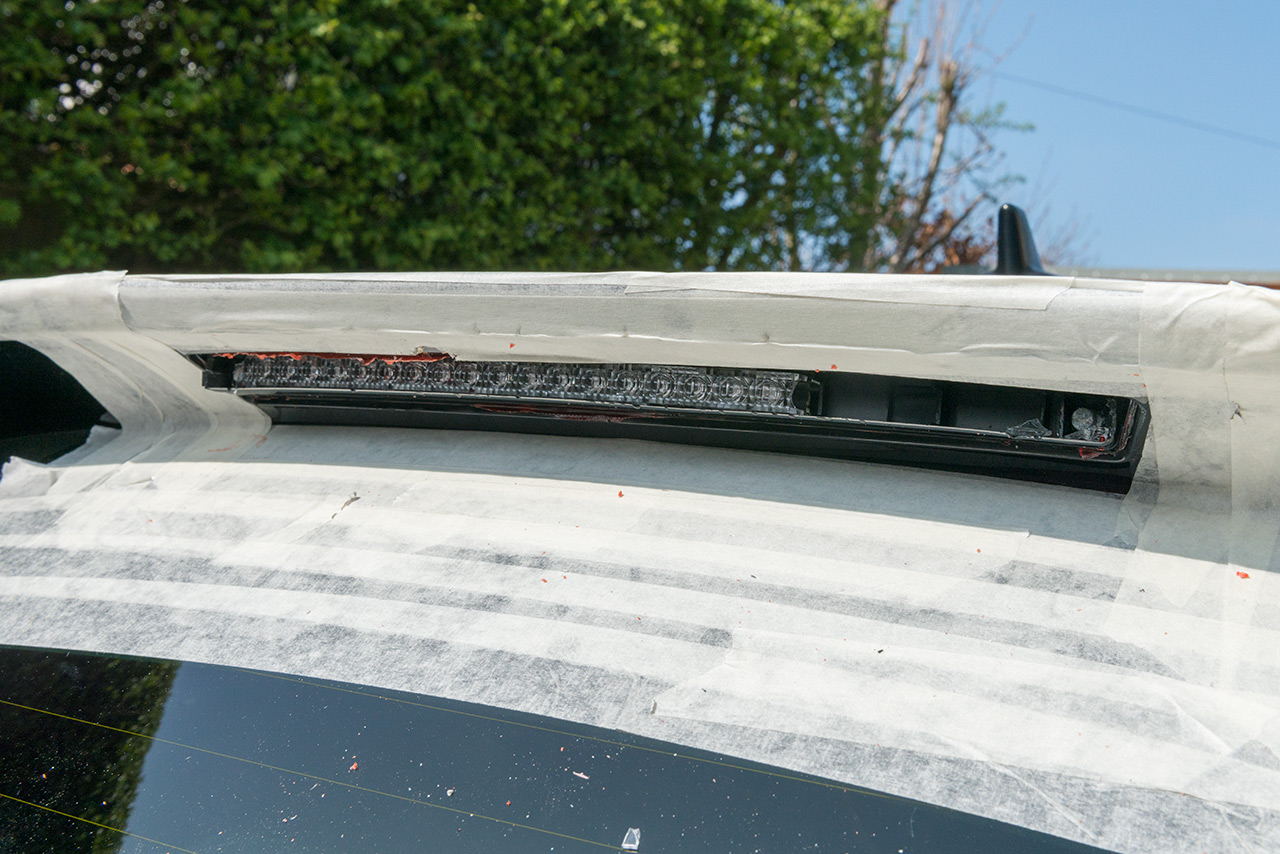
5. wiggle the light past the clip in the middle on the top holding it in. cut off the light from the cable, leaving as much cable free as possible.
6. walk away, make a cup of tea, the difficult bit's over!
Re: Victor
Posted: Mon Mar 27, 2017 3:47 pm
by selleym
Haha someone has just done this to their rocco hoping you quickly make the second part of the guide!


Re: Victor
Posted: Mon Mar 27, 2017 3:51 pm
by easyrider
part 2:
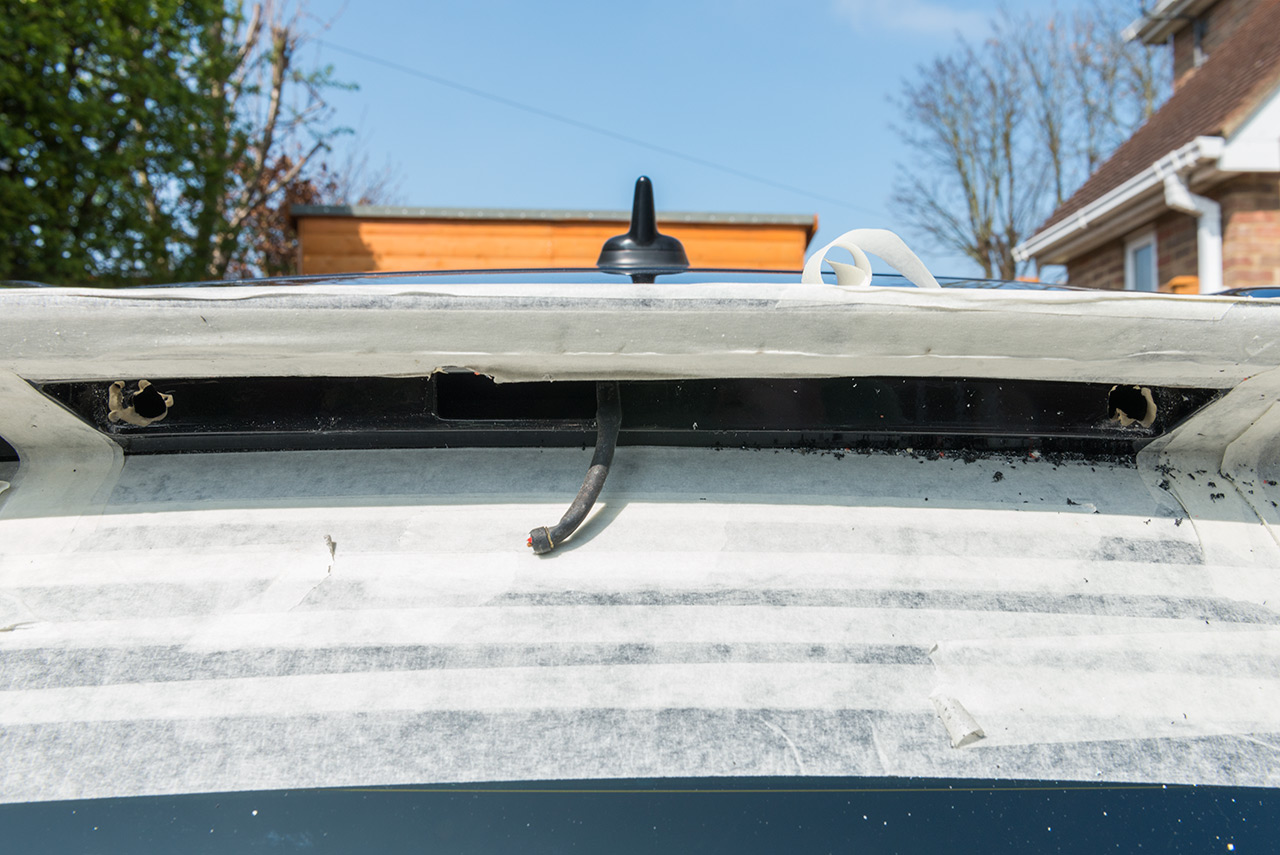
7. while you drink that nice cuppa get some epoxy resin and fill the screw holes in the new brake light unit. will stop any water or moisture getting in... maybe.
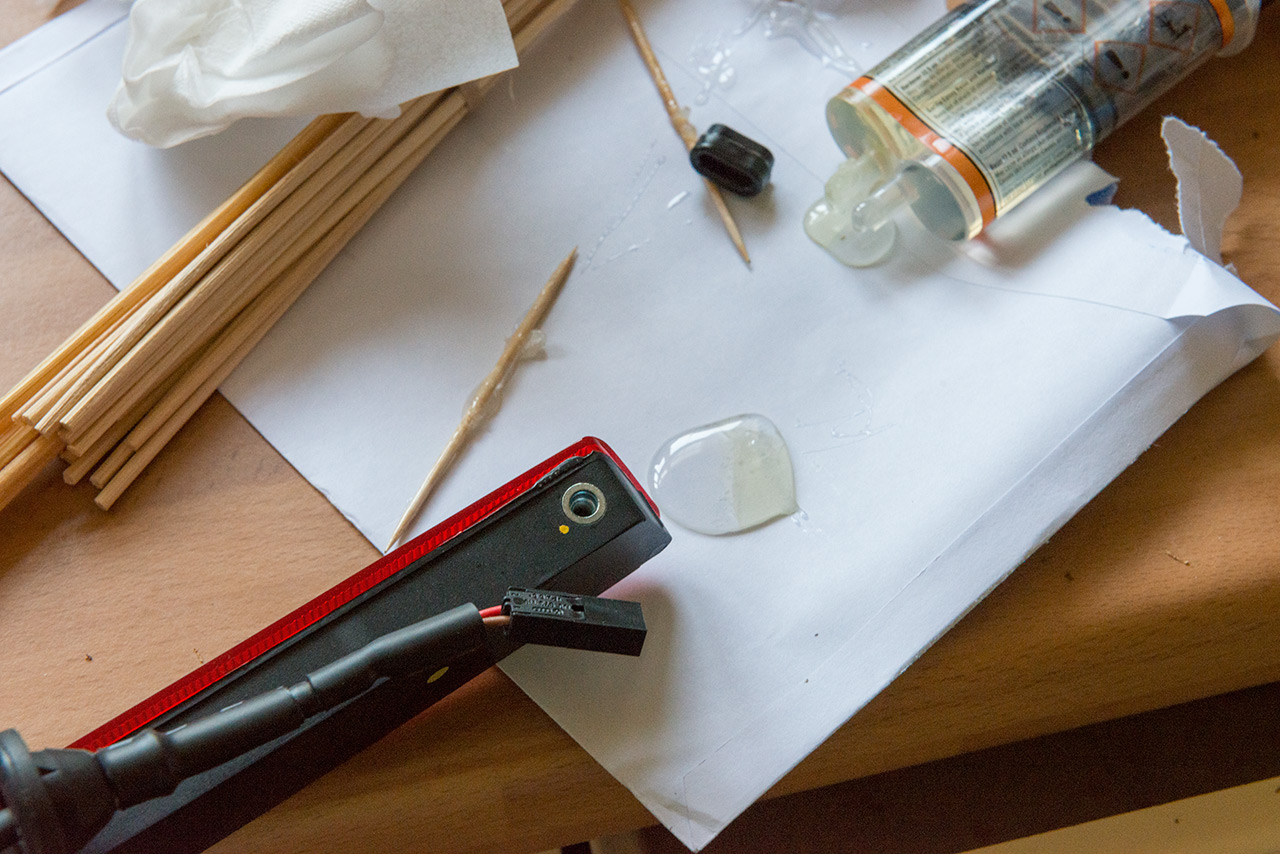
8. wire in a connector on the new unit. probably not best practise here; should have soldered and sealed them but i'll see if these last. wanted to make it non-destructive (ha!) for next time should an led go again - this way i can just wire another in.
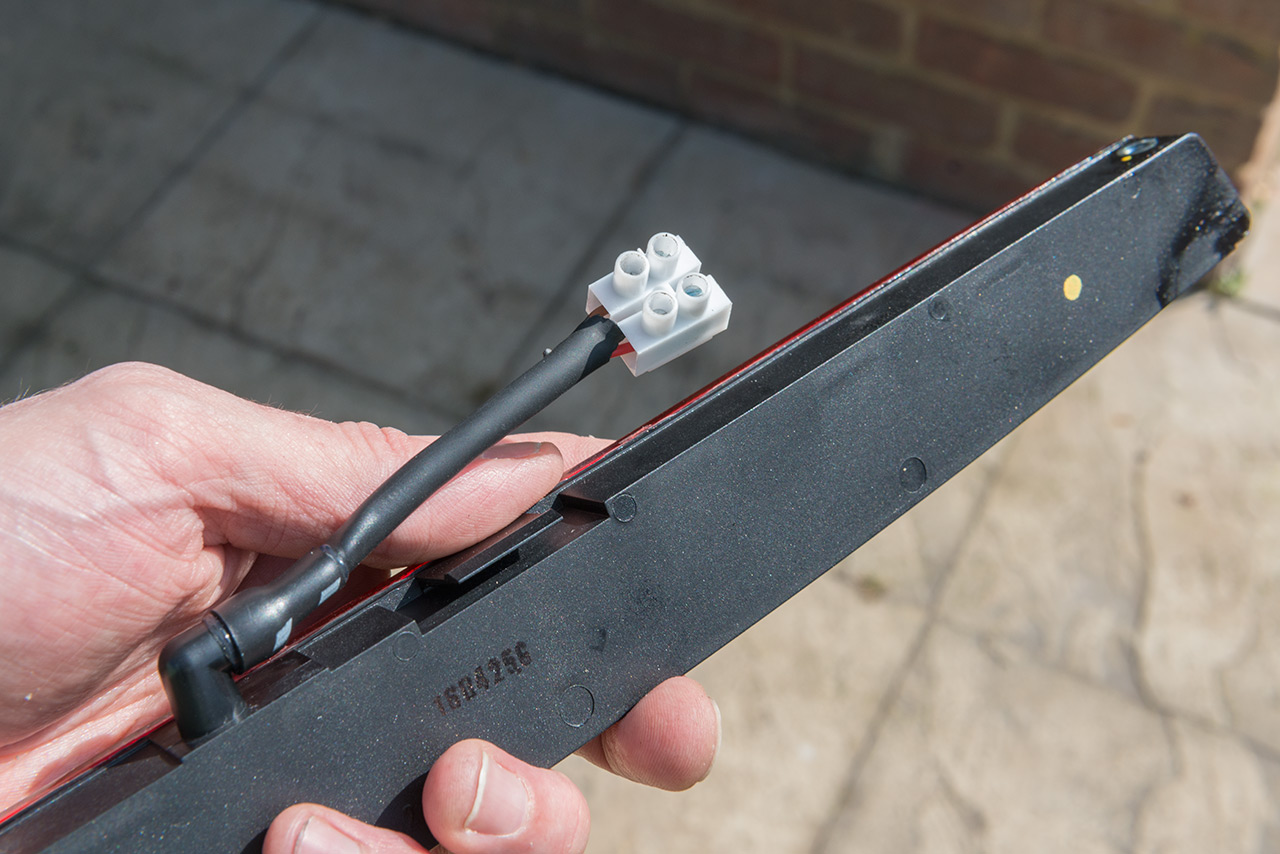
9. connect the old wires. test it!
10. bit of electrical tape over the old holes. mostly because it looks a bit neater, but may help moisture a bit.
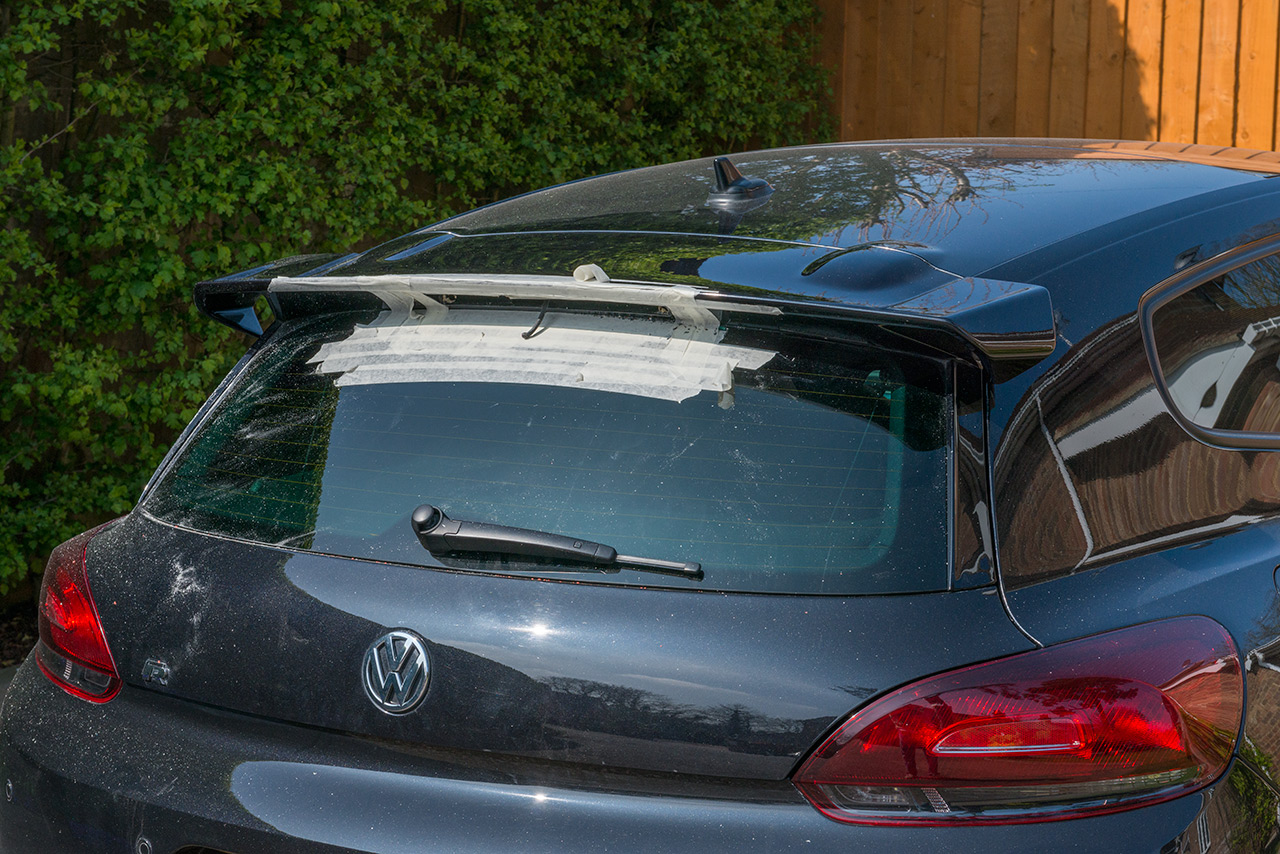
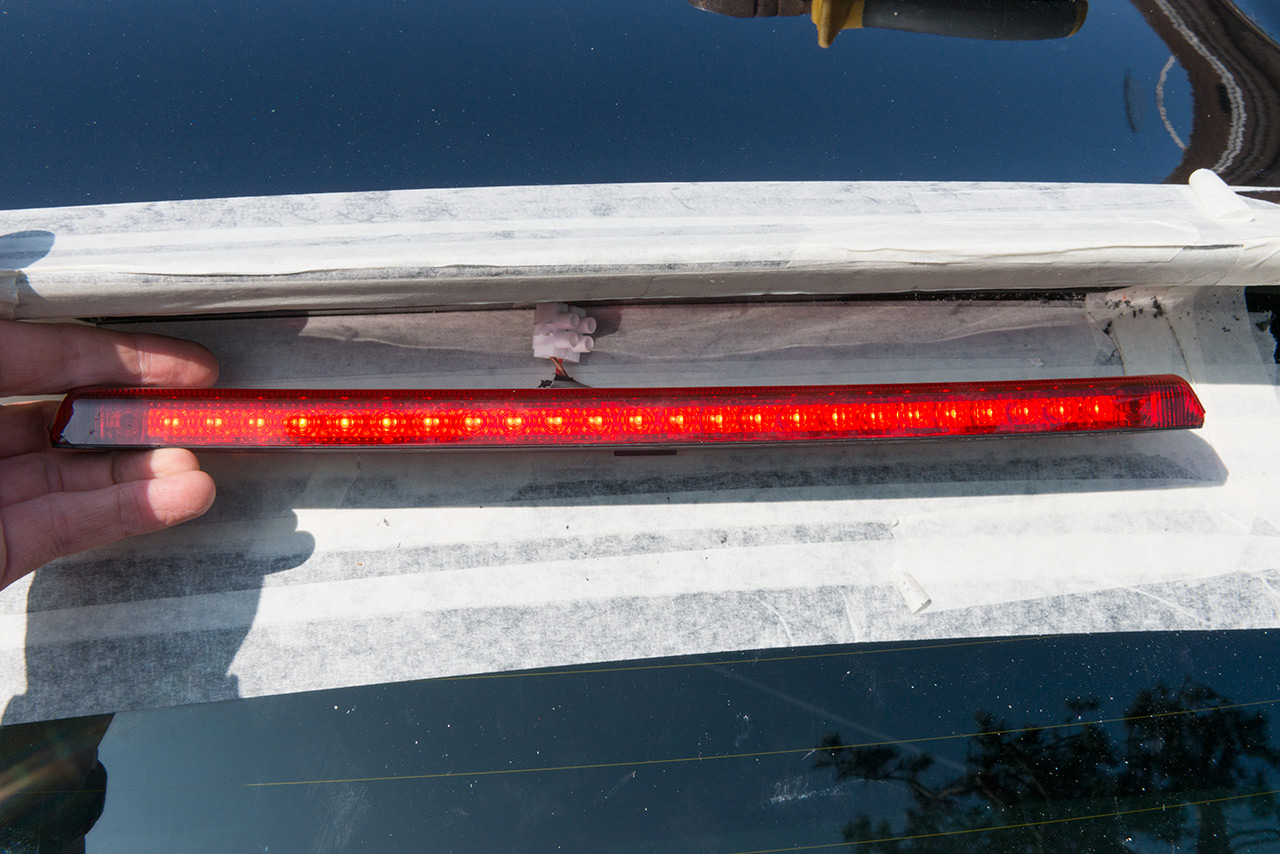
11. pop it in, and here's where i was surprised and chuffed; was prepared to have to bond the unit in or use some 3m tape, but turns out the shape of the back of the spoiler and the clip on the light unit are strong and easily stable enough to hold the unit in solidly. so my big hint on getting a cup spoiler is don't screw the led unit in when fitting. no need, honestly.
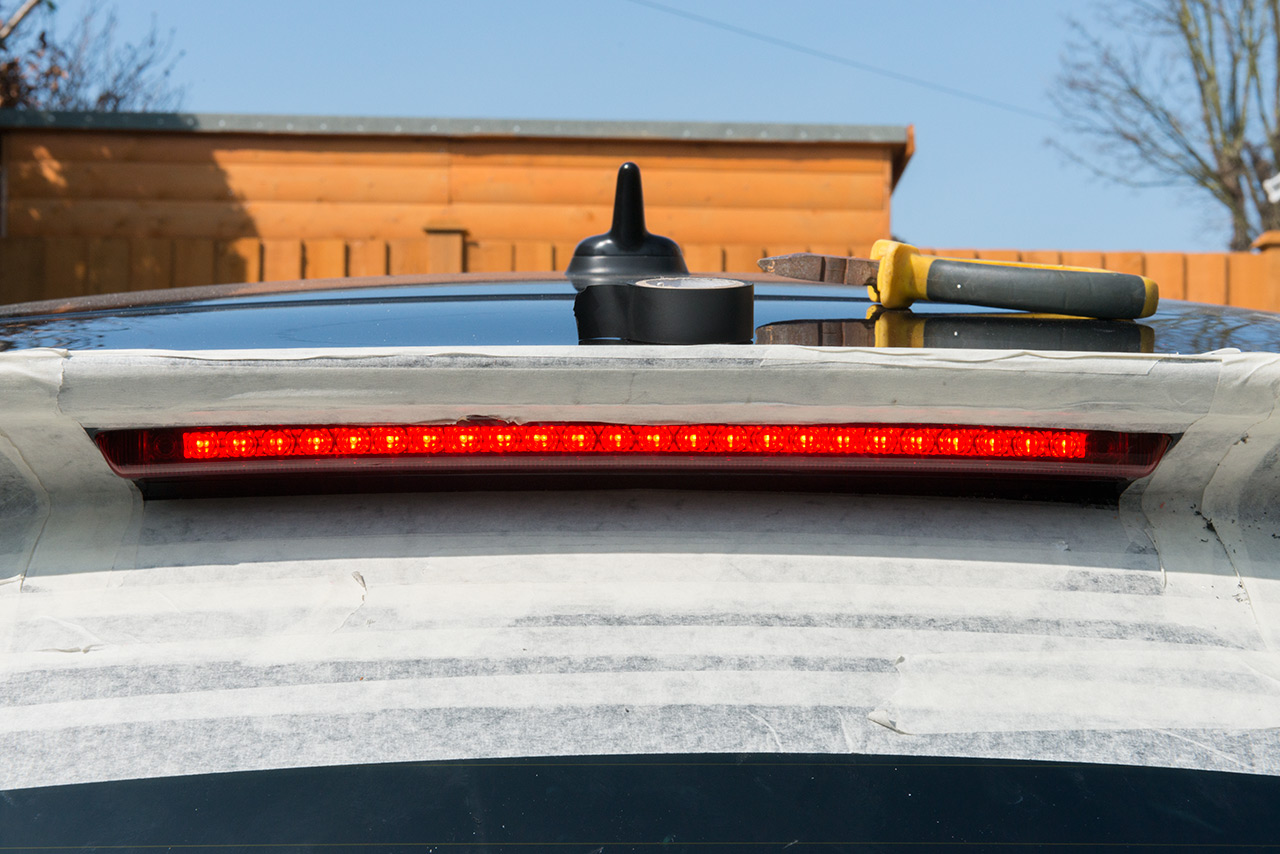
12. unwrap it and clean up. boom!

Re: Victor
Posted: Mon Mar 27, 2017 3:56 pm
by Mostic
Excellent mat [emoji106][emoji122]
Re: Victor
Posted: Mon Mar 27, 2017 3:57 pm
by easyrider
Mostic wrote:Excellent mat [emoji106][emoji122]
lol cheers bud, defo took some balls LOL
Re: Victor
Posted: Mon Mar 27, 2017 4:03 pm
by easyrider
selleym wrote:Haha someone has just done this to their rocco hoping you quickly make the second part of the guide!
sorted!
Re: Victor
Posted: Mon Mar 27, 2017 4:06 pm
by selleym
easyrider wrote:selleym wrote:Haha someone has just done this to their rocco hoping you quickly make the second part of the guide!
sorted!
Just noticed only 7 more posts till your millenia of Scirocco Central!
Re: Victor
Posted: Mon Mar 27, 2017 4:07 pm
by easyrider
selleym wrote:easyrider wrote:selleym wrote:Haha someone has just done this to their rocco hoping you quickly make the second part of the guide!
sorted!
Just noticed only 7 more posts till your millenia of Scirocco Central!
haha maybe i should stop now

Re: Victor
Posted: Tue Mar 28, 2017 8:50 am
by Tymondo
That looks like a right ordeal. You should sell the cup spoiler immediately to avoid this scenario again. Preferably to someone with the same colour car as you

Jokes apart that looks like it's taken a lot of time, patience and dedication. Great job and great guide

Re: Victor
Posted: Sun Apr 02, 2017 2:11 am
by sherock
Re: Victor
Posted: Thu Apr 06, 2017 7:59 am
by Papanick
I really love this car, plus I owe a huge thanks for the:
- felt lined driver's glovebox, small and subtle mod that I already did thanks to your templates (I also did the small "ashtray" space)
- led door card puddle lights and facelift window / boot switches that I'm about to do next week.
Cheers!
Re: Victor
Posted: Sat Apr 15, 2017 10:39 pm
by easyrider
Tymondo wrote:That looks like a right ordeal. You should sell the cup spoiler immediately to avoid this scenario again. Preferably to someone with the same colour car as you
Jokes apart that looks like it's taken a lot of time, patience and dedication. Great job and great guide
thank you, still think i should have soldered it though.
cheers man
Re: Victor
Posted: Sat Apr 15, 2017 10:42 pm
by easyrider
Papanick wrote:I really love this car, plus I owe a huge thanks for the:
- felt lined driver's glovebox, small and subtle mod that I already did thanks to your templates (I also did the small "ashtray" space)
- led door card puddle lights and facelift window / boot switches that I'm about to do next week.
Cheers!
hey thanks - glad people are doing the glovebox, fun little job for a rainy sunday, that. good luck with the door cards, simple job but huge difference; still my favourite tweak. found the trickiest bit finding the right hole numbers for the wires in the door controller. defo get some extra door clips too to be safe...
Re: Victor
Posted: Sat Apr 15, 2017 10:54 pm
by easyrider
Re: Victor
Posted: Sat Apr 15, 2017 10:56 pm
by easyrider
Re: Victor
Posted: Sat Apr 15, 2017 11:40 pm
by tommy
easyrider wrote: defo get some extra door clips too to be safe...
Definitely! I broke 5 today doing both doors lol
Re: Victor
Posted: Sun Apr 16, 2017 1:35 pm
by Willyjay212
easyrider wrote: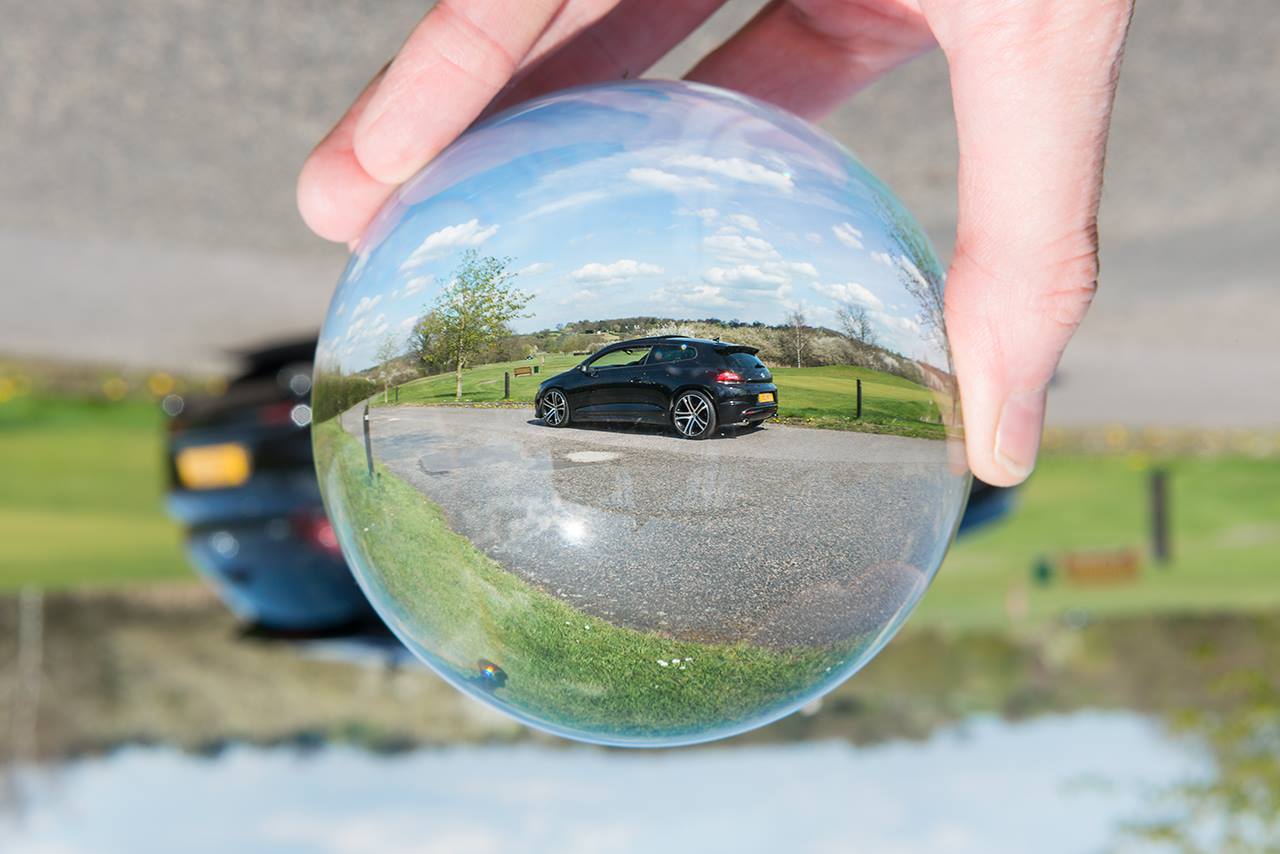
Awesome picture man! How you manage that buddy?
Sent from my F8331 using Tapatalk
Re: Victor
Posted: Thu May 04, 2017 6:26 pm
by easyrider
Willyjay212 wrote:easyrider wrote:
Awesome picture man! How you manage that buddy?
it's just a glass ball from ebay for about £20. only downside is it works like a huge magnifying glass on sunny days. may have scorched my hand a few times in the process of taking this!